
Just play: no import needed
PlayCounter recognizes Battle.net games by the running game, the same way it tracks games from any other launcher. You don’t need to import them or connect your Battle.net account.
- Keep PlayCounter running, even in the tray.
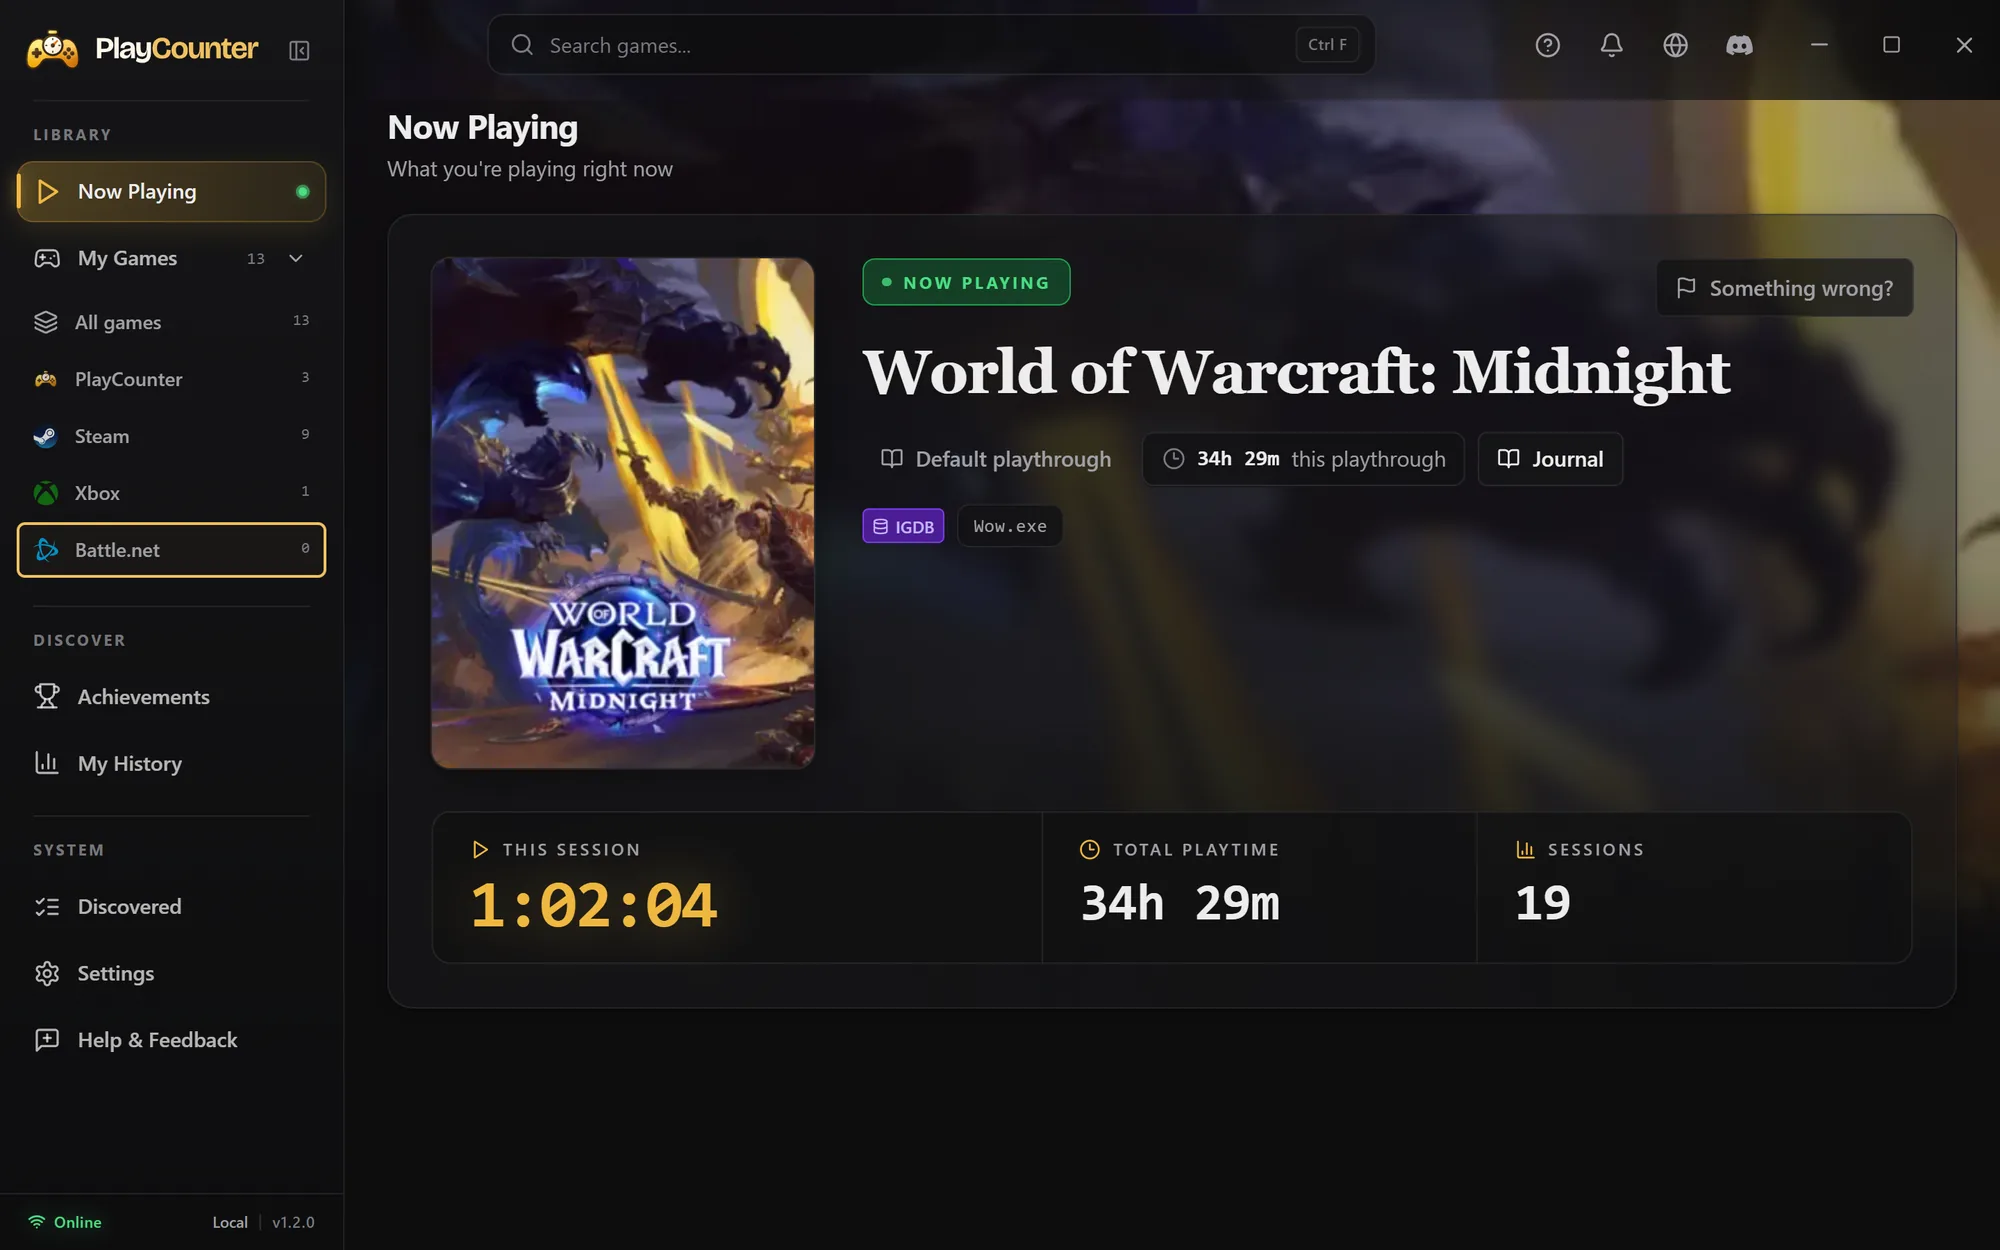
- Start your game from Battle.net as usual. It appears in Now Playing with a running timer.
- Close the game when you are done. The session appears in My History and counts toward the game’s total in My Games.
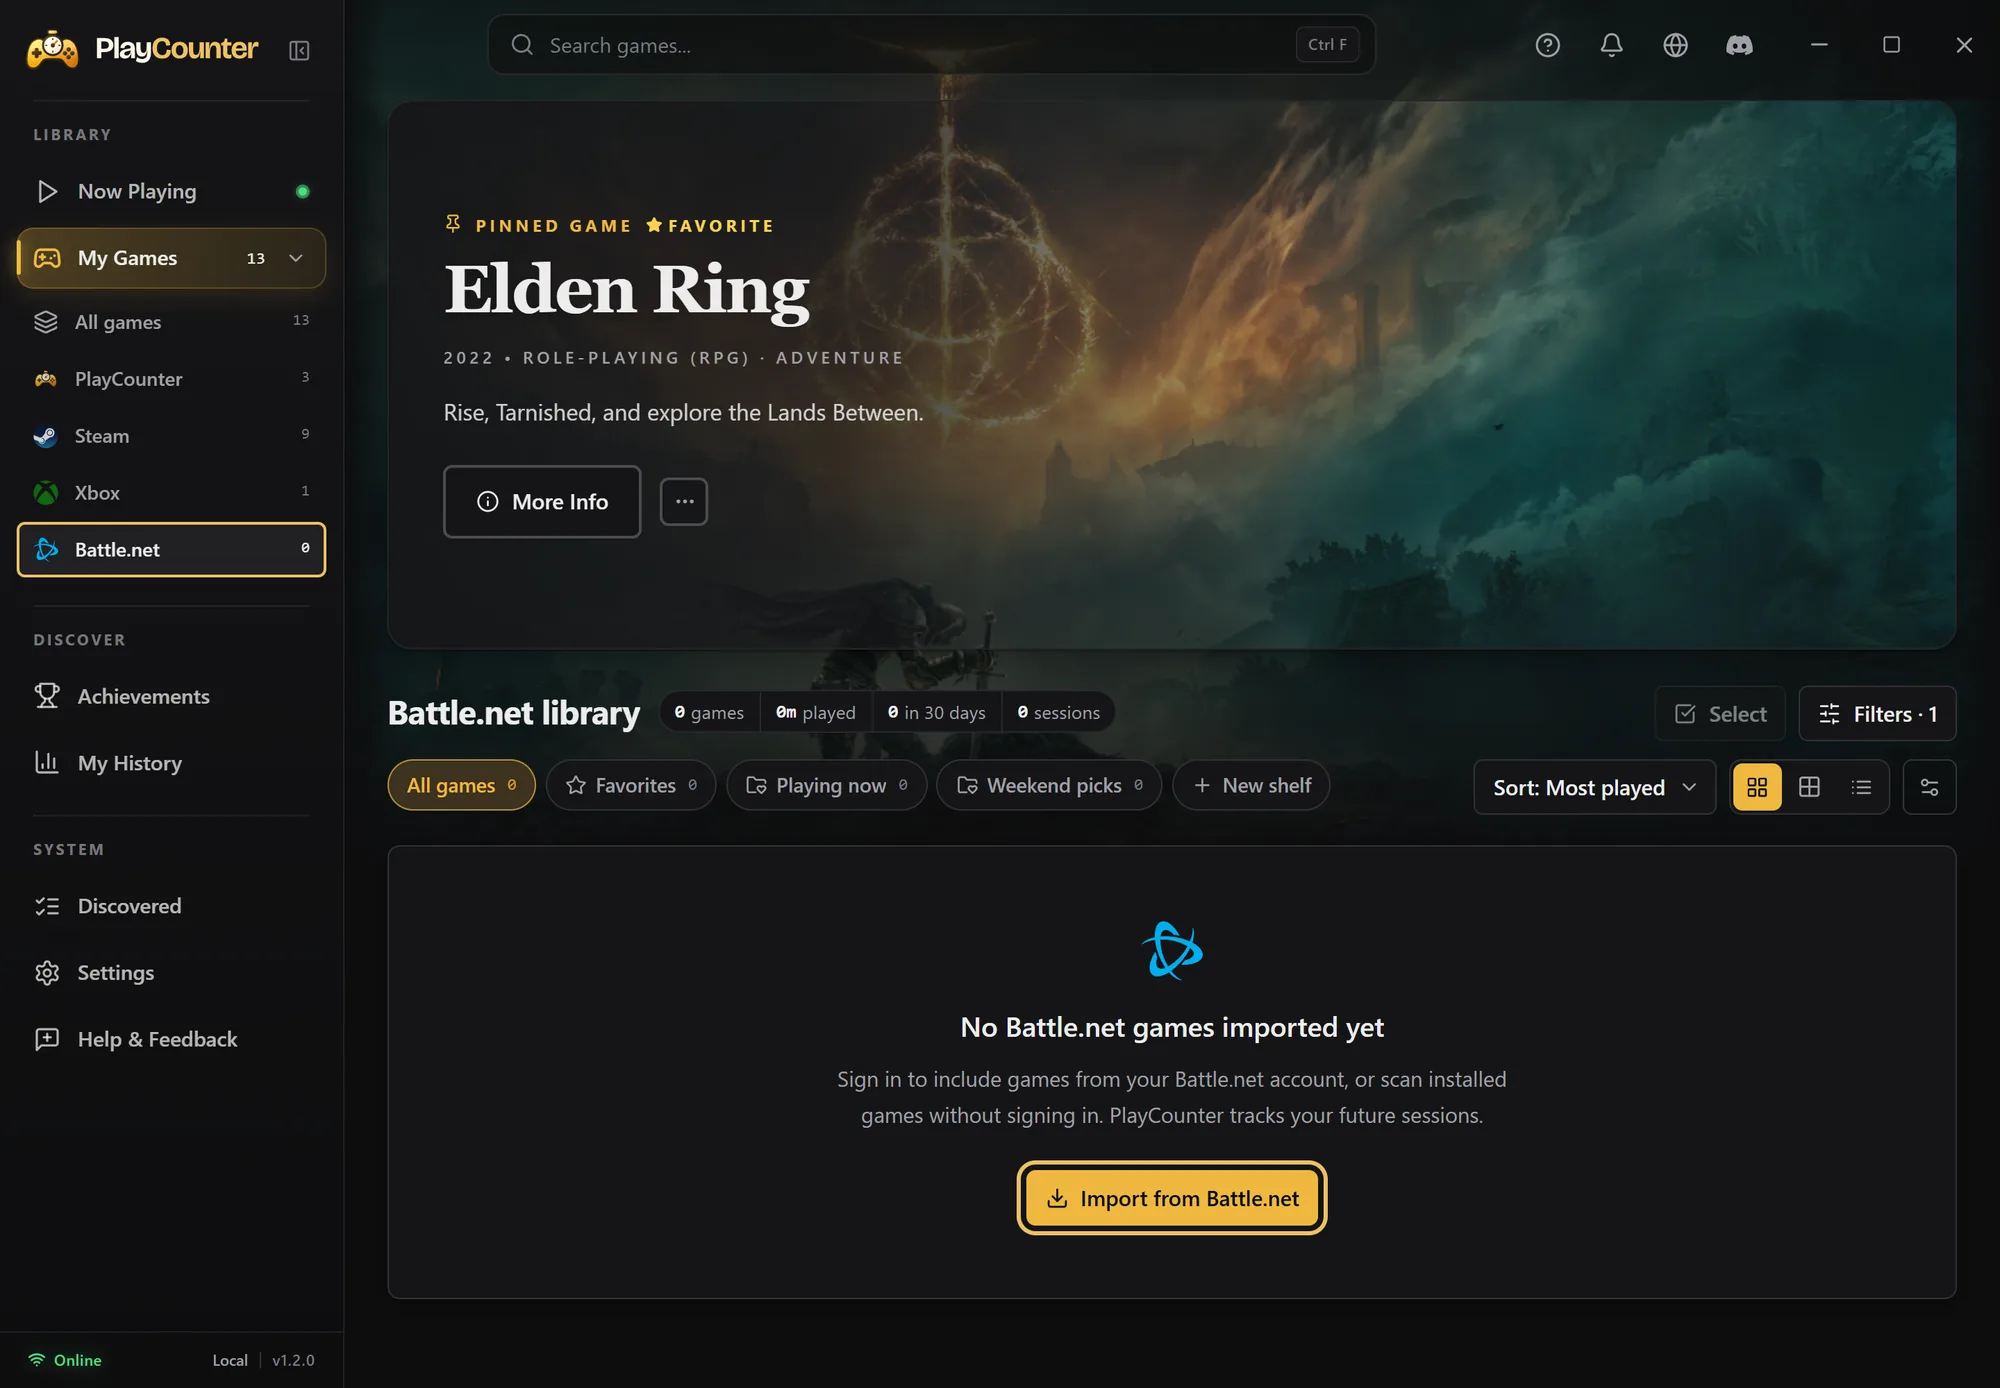
PlayCounter tracks the game itself, such as Wow.exe, not the Battle.net launcher, and it does not split a WoW session by character. In the screenshot, nothing was imported: the Battle.net source shows 0 games, and World of Warcraft is tracked anyway. If a game doesn’t show up, add it in Discovered.
Add the hours you played before
Battle.net doesn’t share playtime, with or without an import. Set each game’s earlier total once, and PlayCounter adds your new sessions on top.
Find your earlier total
In World of Warcraft, type
/playedon each character and add the totals up. The WoW playtime guide has a calculator for that. For other Blizzard games, check the game’s own profile or statistics screen and note what it counts.Right-click the game, then Playtime → Adjust total playtime
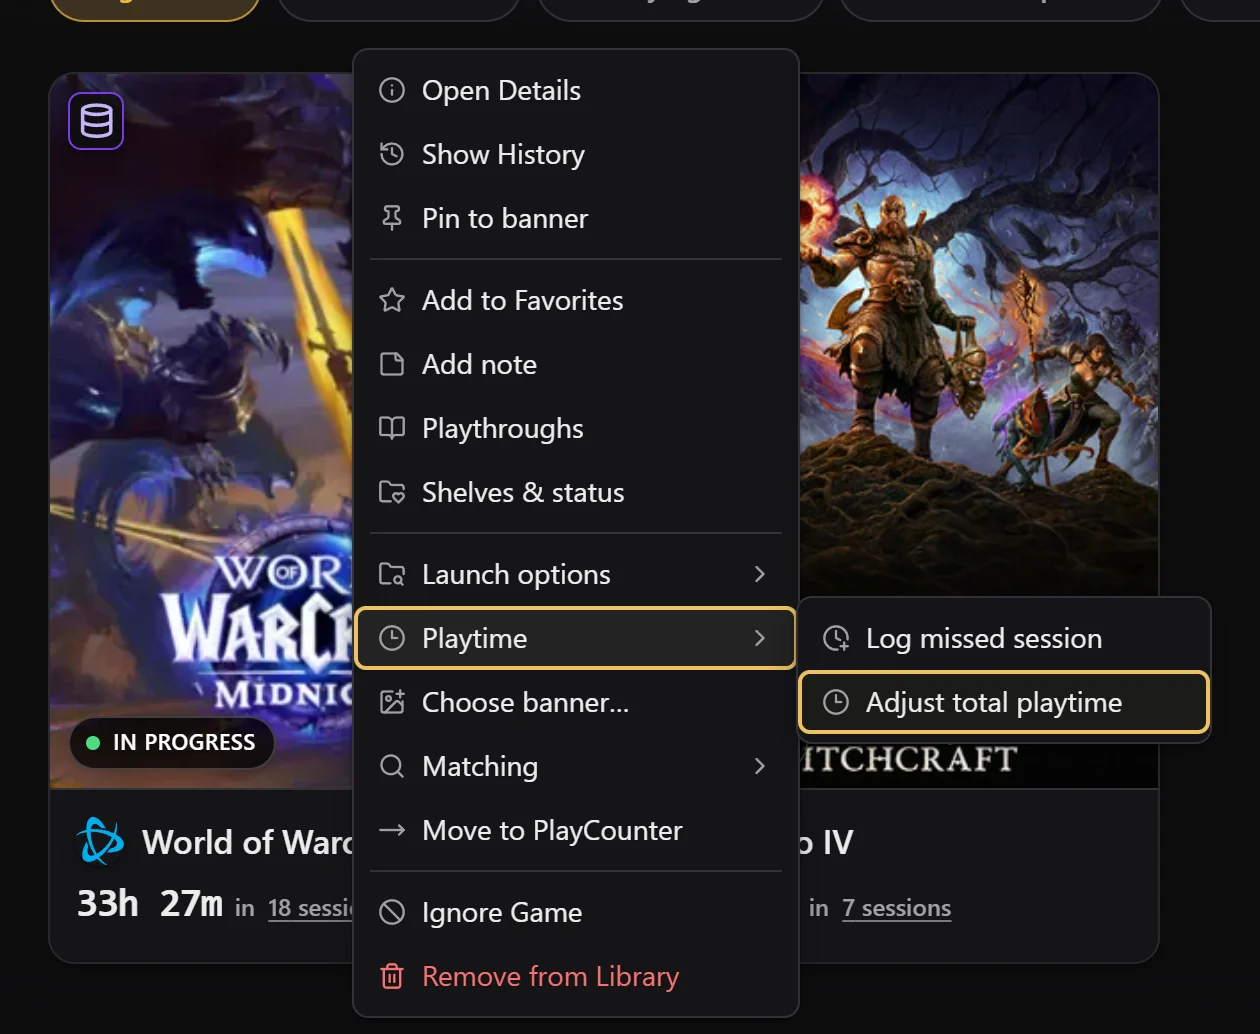
In My Games, right-click the game. Open Playtime and choose Adjust total playtime.
Enter the full total and save
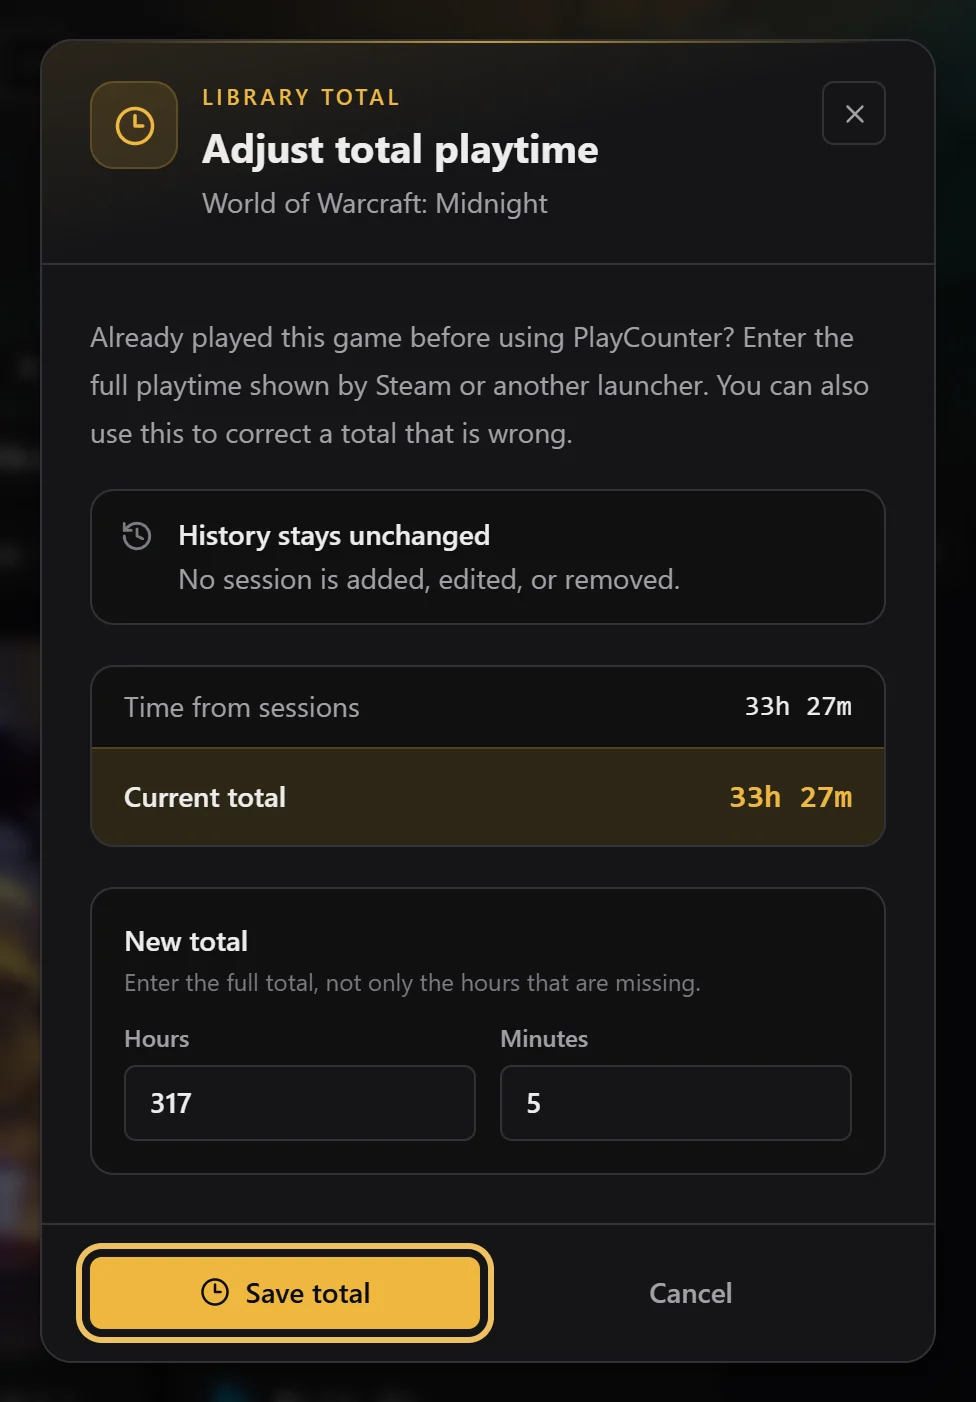
Type the complete hours and minutes, not only the missing part, then select Save total. Your history stays unchanged.
Optional: import your Battle.net games
The import brings no playtime and doesn’t change tracking. It is only useful if you want your Battle.net games in My Games before you play them, including games that are not installed, with covers and launch options.
Open Battle.net in My Games
In the sidebar under My Games, select Battle.net. Then select Import from Battle.net.
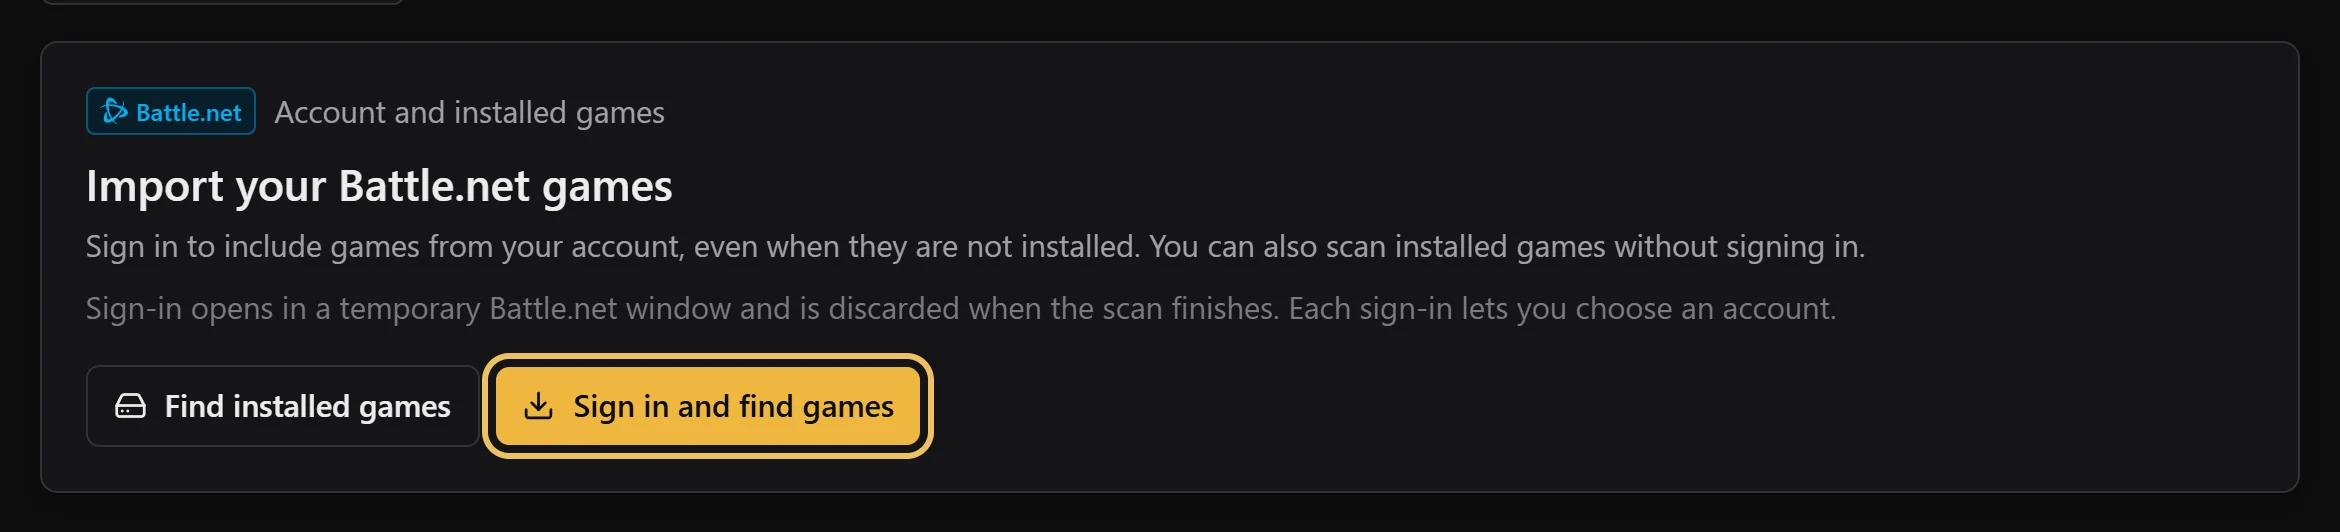
Choose how to find your games
Find installed games only scans this PC and needs no sign-in. Sign in and find games also includes games from your Battle.net account that are not installed.
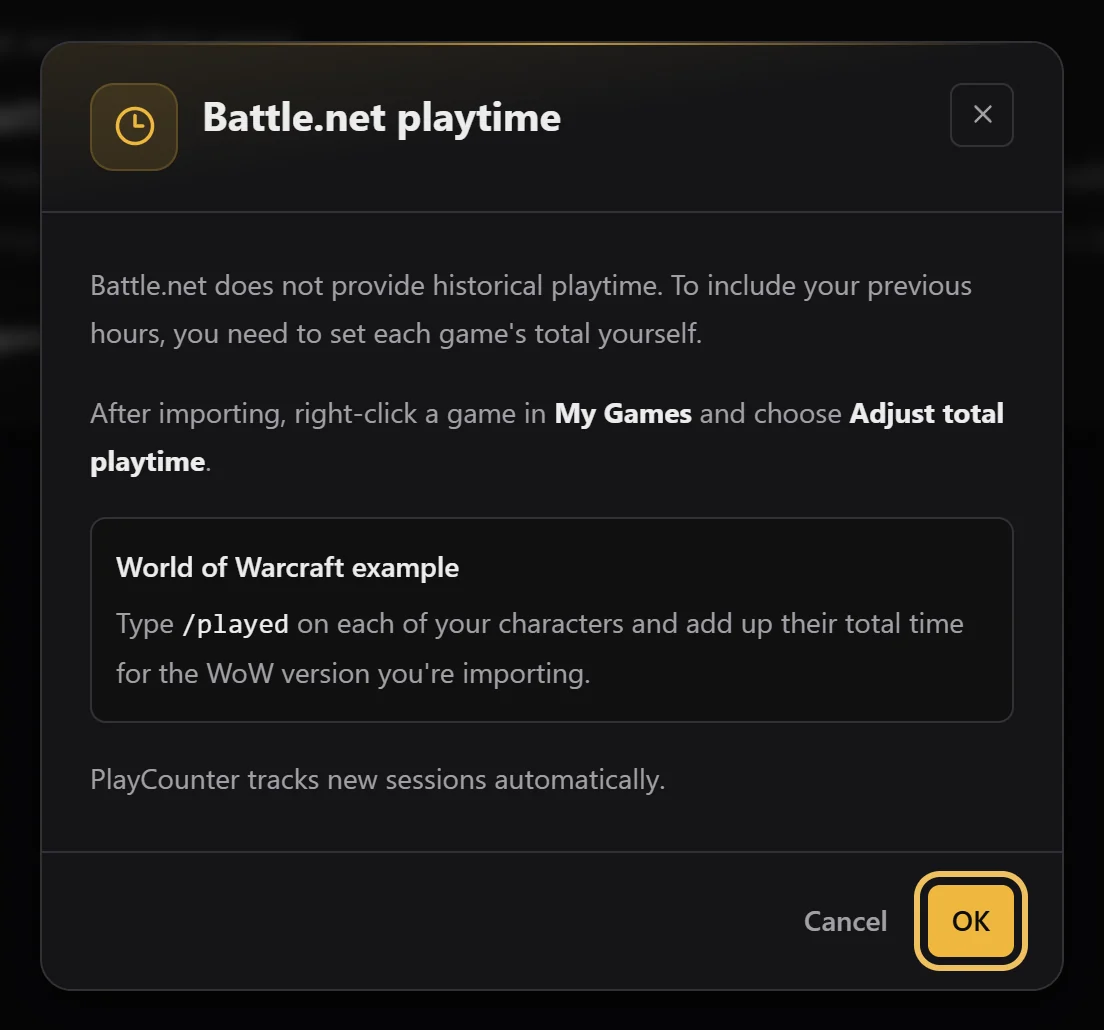
Read the playtime note, then select OK
PlayCounter reminds you that Battle.net has no past playtime to import. If you chose to sign in, complete the Battle.net sign-in in the window that opens.
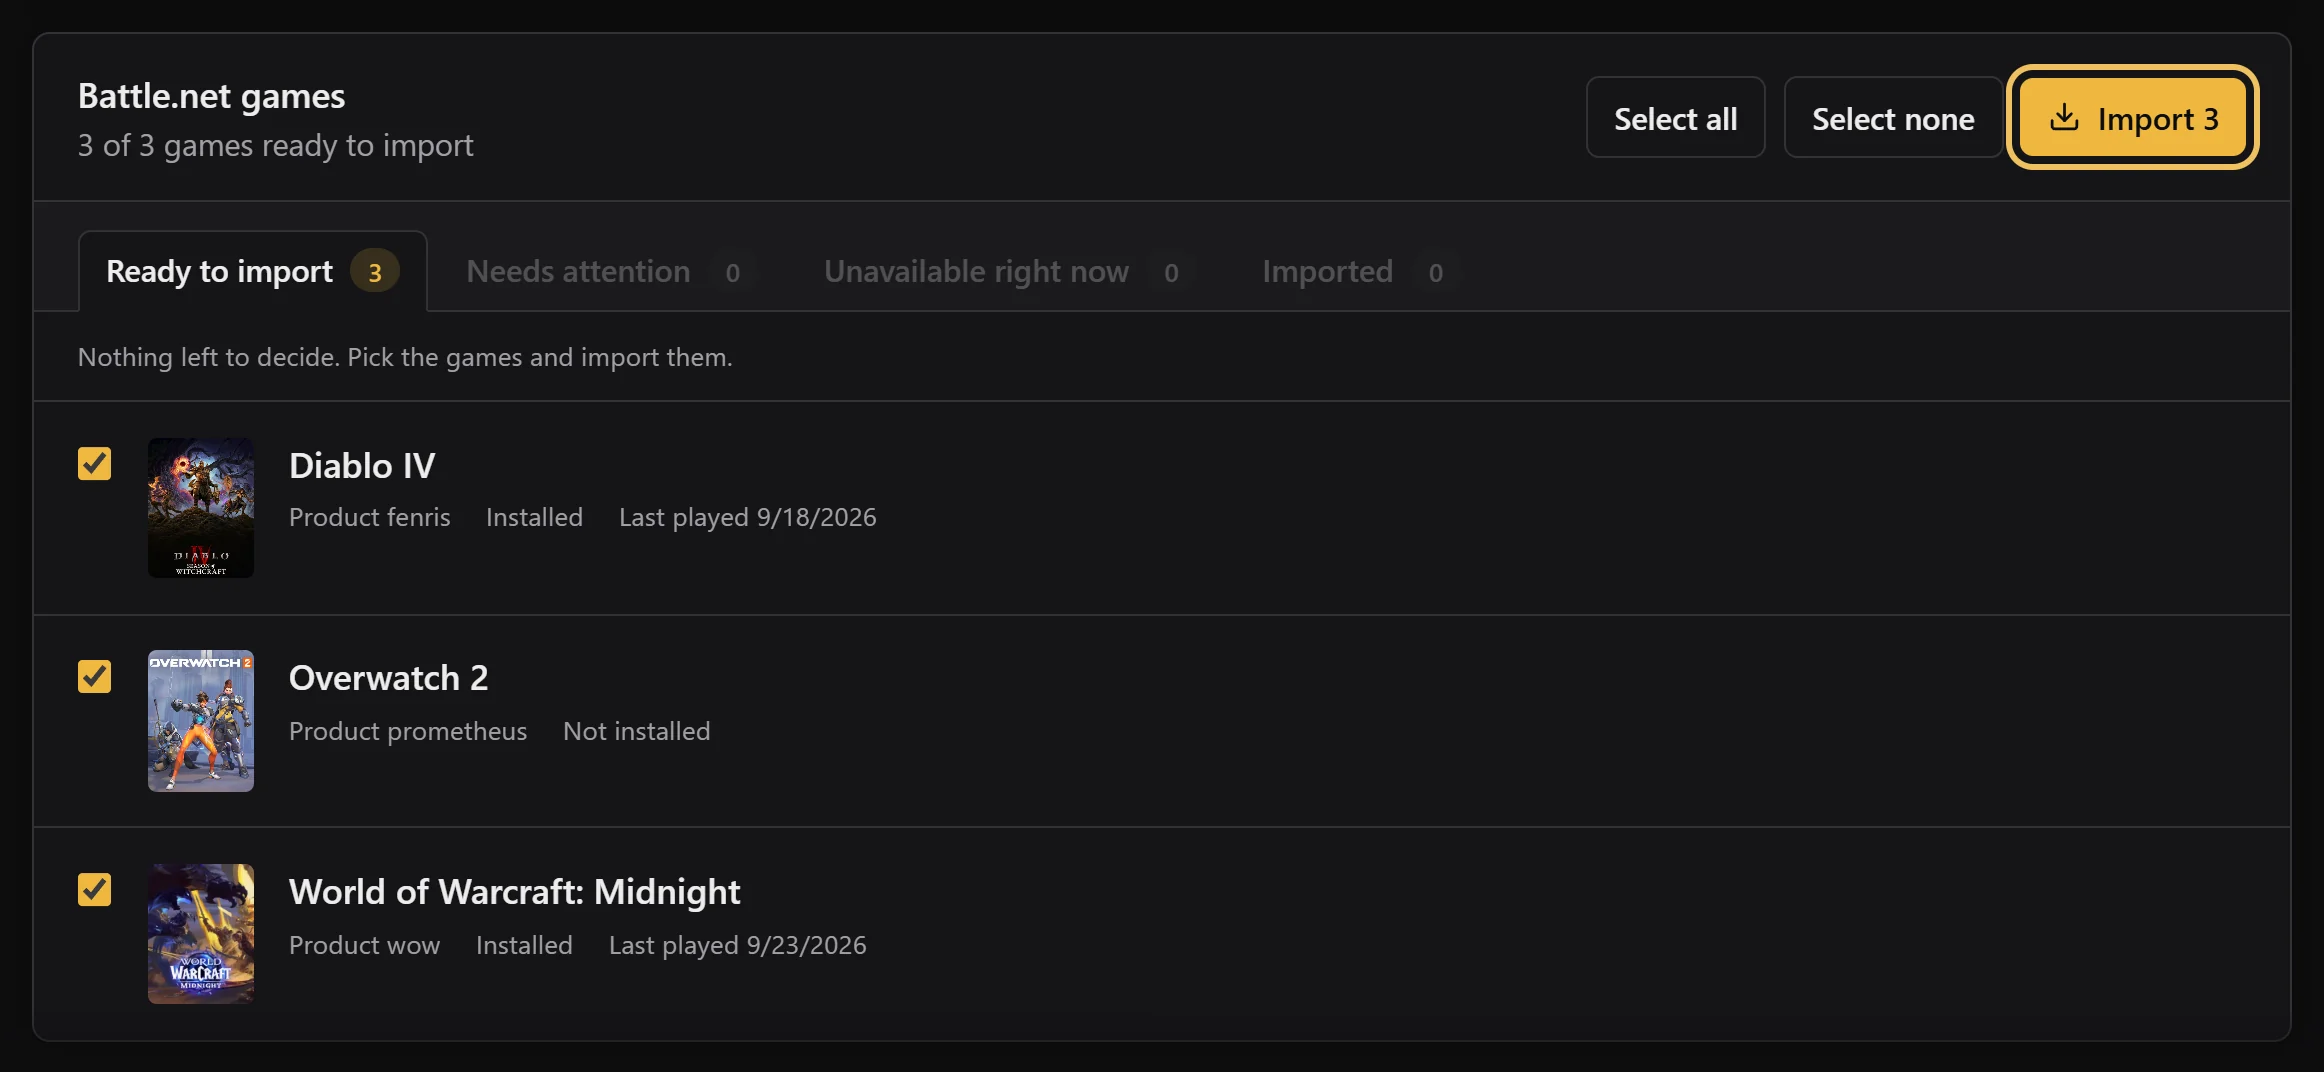
Review and import
Recognized games wait in Ready to import. Uncheck anything you don’t want and select Import. Games under Needs attention ask you to confirm the right game first.
The sign-in window is temporary and is discarded when the scan finishes. Only the list of games leaves it: your password, account details and CD keys are not passed to PlayCounter. Import privacy details.
WoW Retail and Classic are separate games
World of Warcraft and each Classic version have their own entry, playtime and sessions in PlayCounter. When you set a total, add up only the characters of that version. Check the selected title when a match asks for your review.